Maps
Now that we have a navigation component we can build the Map to add markers based on the location of the coffeeshops. We
are going to use the native component that comes with expo MapView.
As always expo comes with a playground to try out the MapView component but more detailed docs are available on
github. The MapView is different between iOS and
android as the maps that are used are different, Apple Maps and Google Maps. You can use any of the two and the
MapView component allows you to specify to use Google Maps even on iOS.
There are two variants of the react-native-maps
You can install via expo which I personally recommend as it takes care of any mismatches in deps
npx expo install react-native-maps
This installs from the original react-native-maps package that at the time of this writing is looking for
help
npm install react-native-maps
So let’s have a quick look at the API
We can plainly see that by default the map is not focused on any one region so we should set a starting location for our
map. You can do this by using the initialRegion.
<MapView initialRegion={oldStreet} style={styles.mapStyle} />
oldStreet is one of our favorite areas in London with plenty of nice coffeeshops. The location in the case of
initialRegion is a 4-keyed object. You can retrieve the lat, long location by using google maps so you can set it to any
location you want.
const oldStreet = {
  latitude: 51.52653,
  longitude: -0.08246,
  latitudeDelta: 0.0922,
  longitudeDelta: 0.0421,
}
Another simple option that you can tweak is the zoomTapEnabled for allowing to zoom when you tap and the default value
is true.
Besides the MapView component there are multiple other components that you can overlay on the map.
- for dealing with interactive elements we have
MarkerandCalloutthese can be used for displaying the map pins and callout for displaying information bubbles when interacting with the markers. - the second type of components is a set that you can use to define areas based on geographical coordinates. The
components that aid us in deinfing a map area are
<Polygon />,<Polyline />,<GeoJson />&<Circle />. - meta information about the map that you can devise from the data that you pull in from your API and overlay into your
app.
<Overlay />- overlay an image, for example you could overlay an image of a different type of map<HeatMap />- add heat points to a map to mark larger densities of a specific data point (talking about you COVID-19)
The way you can enhance your map is by having the extra components (Marker and Callout) nested within the Mapview.
Adding the Markers is quite straightforward:
      <MapView initialRegion={oldStreet} style={styles.mapStyle}>
        {data.map((marker, index) => (
          <Marker
            key={index}
            image={require('<custom-image-path>')}
            coordinate={marker.coordinates}
            title={marker.name}
          />
        ))}
      </MapView>
After adding the marker, in order to enhance the details bubble for each pin you can add a Callout and define a custom
view which can be however customized you want
      <MapView initialRegion={oldStreet} style={styles.mapStyle}>
        {data.map((marker, index) => (
          <Marker
            key={index}
            coordinate={marker.coordinates}
            title={marker.name}
          >
            <Callout style={styles.plainView}>
              <View>
                <Text>This is a plain view</Text>
              </View>
            </Callout>
          </Marker>
        ))}
      </MapView>
Individual workout:
- Add the rest of the pins to the map
- Add a custom component to display some extra information as a
Calloutfor each pin
So far the location of the data points was static so we used more or less predefined values which isn’t necesarrily ideal. We want to access data but we want the data to be contextual to where we are. That is the main point you have to think of when you develop mobile apps.
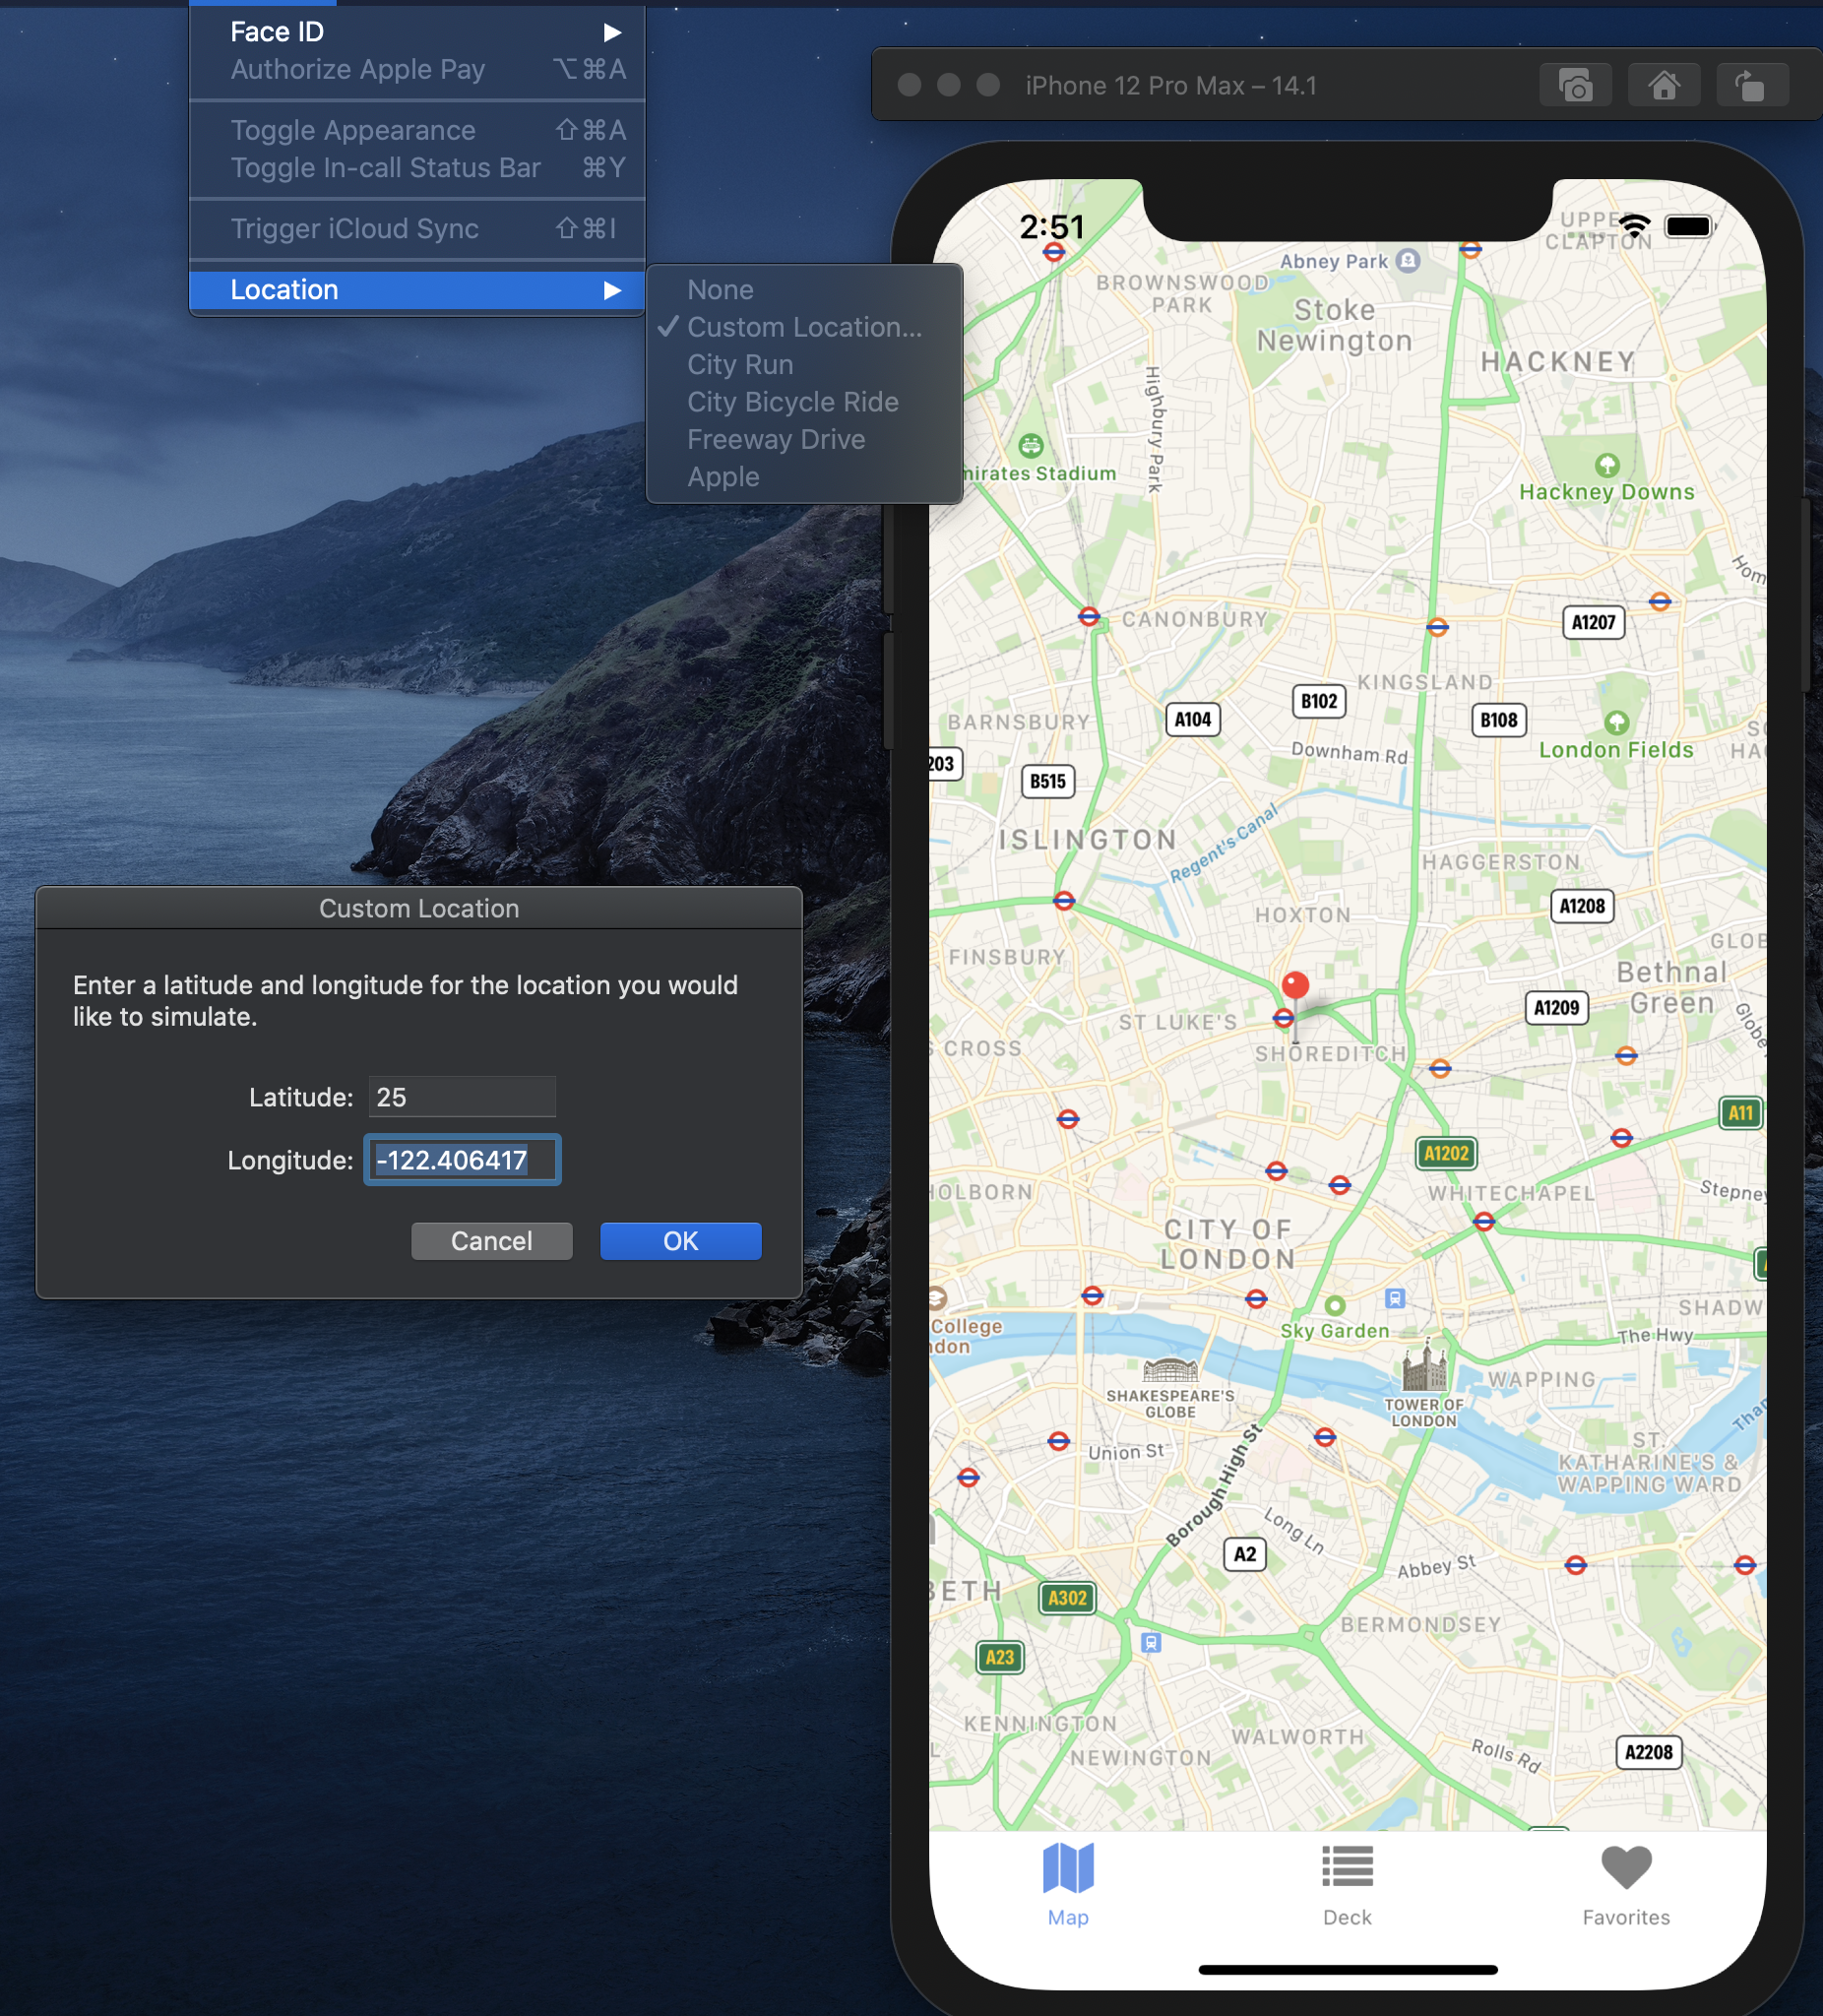
First we will have a look at how we can set a specific location in our emulator.
iOS
android
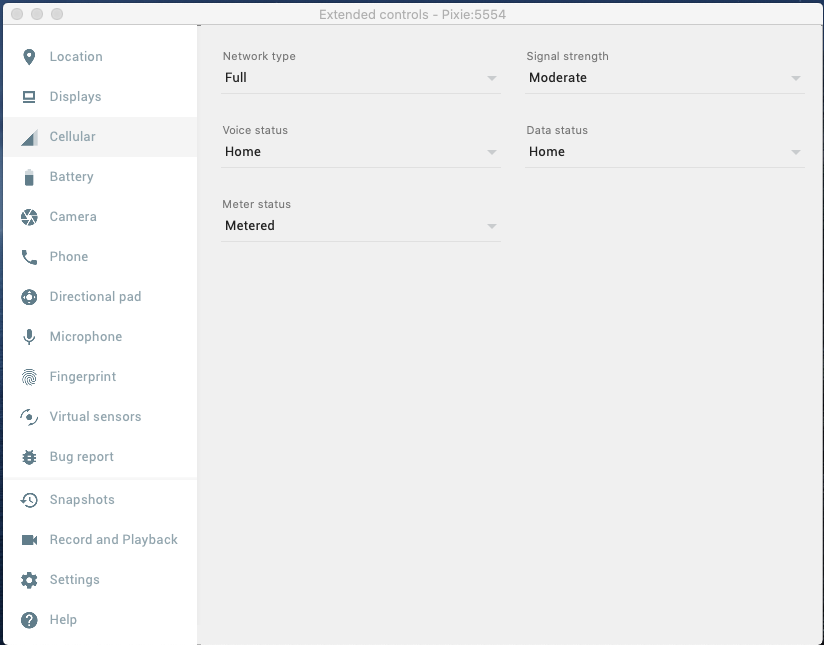
While using an emulator doesn’t give you the real feel of the app it is extremely useful for trying out various edge cases and scenarios you wouldn’t otherwise be able to try out. The options in the emulator allow you to try out throttling, biometric logins and for our immediate interest device location.
In the next step let’s remove the statically defined location and see what tiny gotcha comes into play when we try to access device location. Quick hint, it’s related to device security and data privacy.
// screens/Map.js
...
import * as Location from 'expo-location'
...

export default () => {
  const [location, setLocation] = useState(null)
  const [errorMsg, setErrorMsg] = useState(null)
  const [data, setData] = useState([])

  useEffect(() => {
    (async () => {
      let { status } = await Location.requestPermissionsAsync()
      if (status !== 'granted') {
        setErrorMsg('Permission to access location was denied')
      }

      let location = await Location.getCurrentPositionAsync({
        accuracy: Location.Accuracy.High,
      })
      setLocation(location)
    })()
  }, [])
...
  if (location) {
    currentLocation = {
      ...currentLocation,
      latitude: location.coords.latitude,
      longitude: location.coords.longitude,
    }
  }
  console.log(location)
  return (
    <View style={styles.container}>
      <MapView initialRegion={currentLocation} style={styles.mapStyle}>
        {data.map((marker, index) => (
          <Marker
            key={index}
            coordinate={marker.coordinates}
            title={marker.name}
          >
            <Callout style={styles.plainView}>
              <View>
                <Text>This is a plain view</Text>
              </View>
            </Callout>
          </Marker>
        ))}
      </MapView>
    </View>
  )
}
You will notice that the app will request your permissions for accessing the device location:
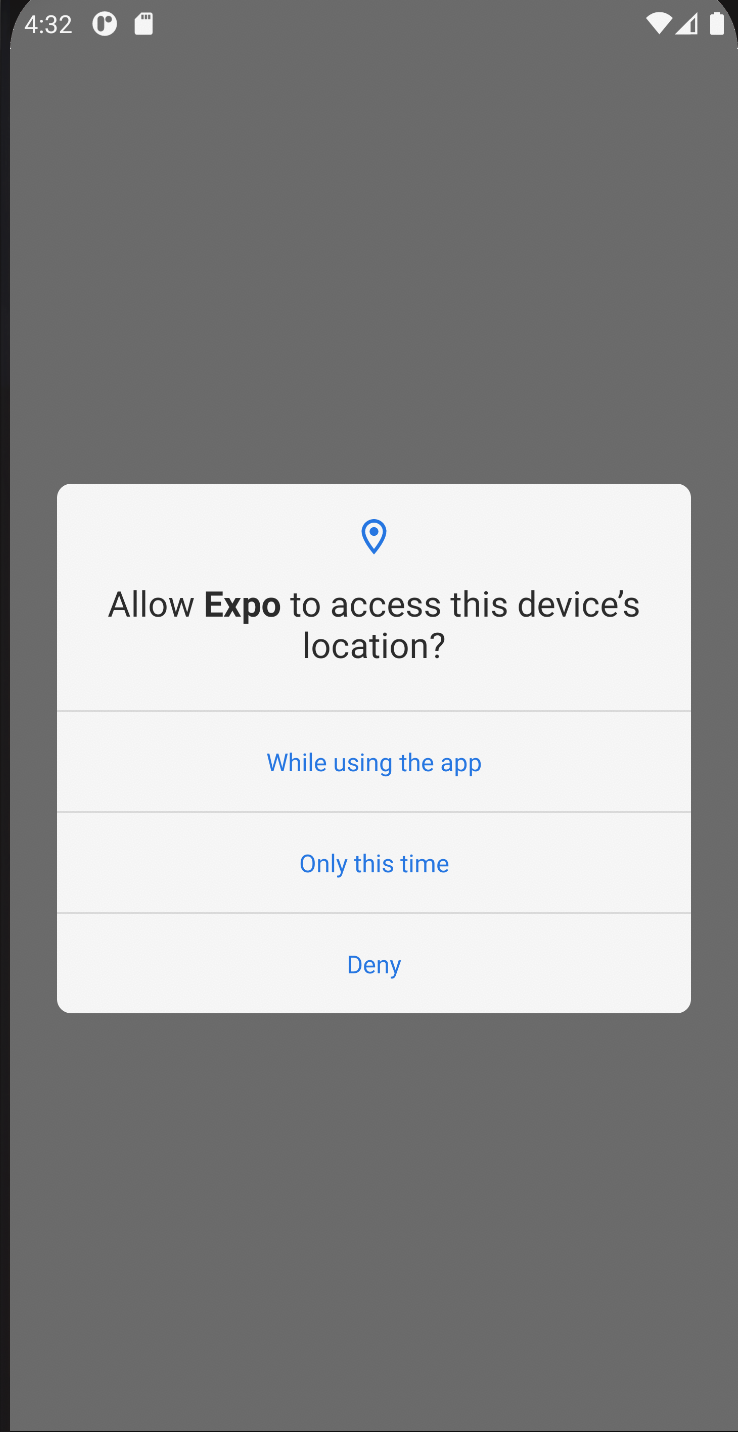
This is our attempt at retrieving the current location of the device which we previously set as oldStreet latitude an
longitude. We tried to update it however the map location did not update. This is because the map is native code under the hood
for the rendering and you can’t really hook into its native rendering APIs from JS. You can only use the Map Apis
through the defined component APIs.
Individual workout
- Add an
<AppLoading />component for display before the location is fetched, so conditionally render the map depending whether the location has been resolved. You will notice that retrieving the current location was considerably slower than the map rendering we had before
// screens/Map.js
import { AppLoading } from 'expo';